Since I have done this soooooooooo many times now (as you can see by just this many characters I've completed), I thought I'd add a few notes to the steps.
How to do this. By the way, my husband in the center, and my son to the right of him, have never worn overall in real life. But, since the girls are in their Easter pajamas, some members in shorts, one in jeans, and even one dressed as a bunny (me)...I wanted something different.
I started out putting everyone in a bunny outfit...but didn't like that. When I found a clipart of the bunny slippers, the idea of pajamas took place.
You can not do cartooning in a program like Printmaster. You need to have Photoshop. Once you own this program, and you realize all the fun you can have with it, you will be amazed that you never owned it.
Step One: Open a file with a full front face photo of someone. Copy this layer. Label the new layer "sketch."
Step Two: Use the magnifying glass to make the face larger.
Step Three: Separate the photo from its background by using the lasso tool. It looks like a mask. Click carefully around the head and neck of the person you want to cartoon. Double click at end of lassoing, to complete the trip.
Step Four: When the lasso is flashing, hit the INVERSE key on the top bar. Hit DELETE on your keyboard. This reversed the cutting of what you have captured and deleted the background. (Can't see background gone? Turn off the background layer.)
Hit Control D on keyboard to turn off the "marching ants" or outlining.
Step Five: DUPLICATE THIS NEW CROPPED IMAGE TO WORK WITH. Leave the layer you just worked with on. If you make a mistake, you still have the original cropped face on its own layer.
Step Six: Go to LAYER on the top menu bar. Go to NEW ADJUSTMENT LAYER from the drop down bar. Go to COLOR, then COLOR DODGE.
Step Seven: Hit Control I (i) on the keyboard. The image should go white. If it does, you are doing everything correctly.
Step Seven: Go to FILTER, then BLUR, the GAUSSEN. Change the range to 7.0.
Step Eight: Go to LAYER, then NEW ADJUSTMENT, then to THRESHOLD. Hit okay. When a new sub-screen pops up, delete to numbers in the little box and change to 234. You can slide the bar at the bottom of the box to see the difference in the amount of detail in the cartoon. But 234 works for most photos. Once you've done this, you have a cartoon.
Step Nine: Go to top MENU BAR. Go to LAYER, then NEW, the LAYER. Change the MODE to MULTIPLY. (This made a new layer that lets you color wash over the cartoon without changing it).
Step Ten: Go to the PAINT BRUSH on your side menu strip. Start painting. If you can't find a skin color you like, click on the color box on the menu strip and look at the small box with numbers/letters on this page. For skins colors in my family, I have found the following numbers helpful:
f9eab7
e6b870
4c994
Medium Brown: 93642c
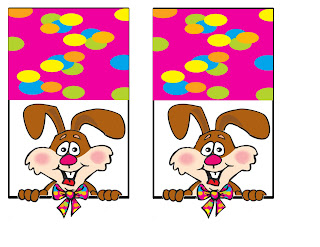
I am using this cute bunny for treat bags for jelly beans. If you print this up landscaped on 8.5" x 11" paper, each bag should be 4" wide. Happy Easter.


No comments:
Post a Comment