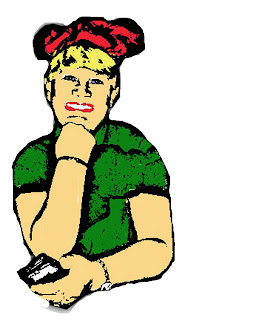
Showing posts with label Cartooning. Show all posts

Monday, March 11, 2013

How I Cartooned My Family

I wrote a previous post on how to cartoon your family.  You can find it in my search box or go hereSince I have started doing this mural of my family, more members wanted to be cartooned or didn't like their paper doll.  If you compare the photo below to the photo above, you will see changes.  My nephew didn't want to be wacky on the bike.  So I put him on a motorcycle.  He wanted me to cartoon his baby daughter.  She's in pink.  My niece Erin wanted to look more funky.  It took me awhile.  She sent a new face picture.  I had been downloading photos from Facebook. I added some members in fancy clothes.  My "piece de resistance" is my sister Peggy in the middle.  She normally drives a scooter for mobility.  Since I put myself in a nice outfit, I still needed an Easter Bunny.

Since I have done this soooooooooo many times now (as you can see by just this many characters I've completed), I thought I'd add a few notes to the steps.

How to do this.  By the way, my husband in the center, and my son to the right of him, have never worn overall in real life.  But, since the girls are in their Easter pajamas, some members in shorts, one in jeans, and even one dressed as a bunny (me)...I wanted something different.  

I started out putting everyone in a bunny outfit...but didn't like that.  When I found a clipart of the bunny slippers, the idea of pajamas took place. 

 You can not do cartooning in a program like Printmaster.  You need to have Photoshop.  Once you own this program, and you realize all the fun you can have with it, you will be amazed that you never owned it.  

Step One:  Open a file with a full front face photo of someone.  Copy this layer.  Label the new layer "sketch."
Step Two:  Use the magnifying glass to make the face larger.
Step Three: Separate the photo from its background by using the lasso tool.  It looks like a mask.  Click carefully around the head and neck of the person you want to cartoon. Double click at end of lassoing, to complete the trip. 
Step Four: When the lasso is flashing, hit the INVERSE key on the top bar. Hit DELETE on your keyboard. This reversed the cutting of what you have captured and deleted the background.  (Can't see background gone?  Turn off the background layer.)
Hit Control D on keyboard to turn off the "marching ants" or outlining.
Step Five: DUPLICATE THIS NEW CROPPED IMAGE TO WORK WITH.  Leave the layer you just worked with on.  If you make a mistake, you still have the original cropped face on its own layer.
Step Six:  Go to LAYER on the top menu bar.  Go to NEW ADJUSTMENT LAYER from the drop down bar.  Go to COLOR, then COLOR DODGE
Step Seven:  Hit Control I (i) on the keyboard. The image should go white.  If it does, you are doing everything correctly.
Step Seven: Go to FILTER, then BLUR, the GAUSSEN. Change the range to 7.0.
Step Eight: Go to LAYER, then NEW ADJUSTMENT, then to THRESHOLD.  Hit okay. When a new sub-screen pops up, delete to numbers in the little box and change to 234.  You can slide the bar at the bottom of the box to see the difference in the amount of detail in the cartoon.  But 234 works for most photos.  Once you've done this, you have a cartoon.
Step Nine:  Go to top MENU BAR.  Go to LAYER, then NEW, the LAYER.  Change the MODE to MULTIPLY. (This made a new layer that lets you color wash over the cartoon without changing it).
Step Ten:  Go to the PAINT BRUSH on your side menu strip.  Start painting.  If you can't find a skin color you like, click on the color box on the menu strip and look at the small box with numbers/letters on this page.  For skins colors in my family, I have found the following numbers helpful:
f9eab7
e6b870
4c994

Medium Brown:  93642c

 I am using this cute bunny for treat bags for jelly beans.  If you print this up landscaped on 8.5" x 11" paper, each bag should be 4" wide.  Happy Easter.


Tuesday, September 4, 2012

My daughter's a Paper Doll


If you've been following my blog, you know that my daughter is having a beach party birthday.  My last blog explained how I made the beach themed placemats using clipart and large 12" x 18" plastic envelopes.  If you research make your own placemats on my blog, I explain where to order the envelopes.

The mats seemed to be missing something.  Then I thought it would be fun to make Annie into a paper doll.  I tried many times, and the one above is my final choice.  I had to search for the right body and position.  This clipart started as a girl in a bikini.  I used Photoshop to color in the middle to make a one piece bathing suit.  I added different hands and feet from www.iclipart.com.  I had cartooned her head last January.  If you find my post on how to cartoon and just follow the steps, you could do this with your kids also. I just copied her head only and added it to the clipart body. 
 
When my husband saw this, he actually thought it was quite fun.  I've had a horrible case of poison ivy with a viral infection on top of it.  I had to do something while being sick.  
I sprayed a big basket from Michael's brown like I did for the nautical baby shower.  These sails are a lot larger.  I am filling the boat with small gifts and using it as a centerpiece.  
I'll take pictures at the party.  I hope the sandcastle cake turns out.  I bought a special large deep square pan for the base, just for this project.  I found ideas on Pinterest.  I bought dollar sand buckets earlier in the summer to use as lunch pails.  

After making one daughter into a paper doll, my other daughter and adopted daughters (college friends who have lived and traveled with me) wanted to be paper dolls.  I had already done most of their heads for last year's Disney World tee-shirt, so I just had to add the heads to different bodies.  I bought the body you see in the number  4, 5, and 6 boxes.  The others were bits and pieces from www.iclipart.com.

I used the boxes from my Safari Roulette game. See previous post.  I made my son and daughter's boyfriend taller (because they both are tall).  I sent a copy of this photo to the girl's this morning.  They didn't recognize the girl in box 8, because she has long blond hair now.  

I hope the family loves playing this game as much as I liked making it.  We're trying it out before I use it with 25 guests at the baby shower.


Tuesday, January 31, 2012

Photo Transfer onto T-Shirt

    This photo is not the final one I printed.  As you can see we added a castle and fireworks.  We also made the box larger in order to put all of the words on the bottom.
If you want to find me, I am the only one wearing sunglasses. 

   Look at the cartoon on the lower left with the green Mickey shirt.  This shows you how each cartoon is a different layer.  I had to arrange everyone carefully to fit in the box.

   My graphic designing daughter came over the other night. She's the cartoon in the black and white stripes.  She showed me the LINK button.  She highlighted all the names of these people (I ALWAYS label each layer).  Then she clicked on the link button on the layers toolbar.  I, of course, didn't even know it was there.  It looks like a sideways figure eight.  Then she could just shift the whole group wherever she wanted with that fabulous little black arrow.

   She added the castle and fireworks and changed their colors.  I can't do that yet.

   So....off to Office Depot I went.  I bought the Avery 3279 iron-on transfers for inkjet and DARK FABRICS.  I didn't even know they had this.  I was hesitant to use it.  The nice thing about this product is that you don't have to reverse the image in order to iron it.
   I found an OLD black t-shirt.  I ironed it to make it smooth.  I pulled the backing off the image, and I placed the printed image on the transfer paper on the shirt.  I put the wax overlay on top .  I ironed it.  The dark colors looked great on the black t-shirt. 

   I have the images all printed out and drying on the dining table.  I have the t-shirts I bought on sale at Target.  Now...the hard part.  Measuring exactly.  My math friend, above in pink shirt, told me to measure from the side seams--not the armhole seam.  I will find the middle of the shirt.  Then I will find the middle of the transfer.  Hopefully, by matching the two middles, this will work.  I'll let you know by taking a picture of the group in their shirts. If you want to see how I turned my family into Easter cartoons, go here.

   On a side note, while on Pinterest this weekend, I went in to a few web sites that caused Malware on my computer.  My Google bar froze up and I couldn't go to my blog.  I ran a clean-up scan.  I called the "computer guy" at work.  We spent an hour on the phone, but couldn't fix it. It kept sending me to "Google UK."  Finally this morning, I reasearched "How to clean up a bad search bar."  See steps below:
  • Open the Internet Explorer application by clicking on the desktop icon.
  • Click Tools and click Internet Options in the drop-down menu.
  • Click Advanced in the Internet Options dialog box.
  • Click the Reset button.  Close all open Internet Explorer windows and click OK.
  • Click Reset again in the Internet Explorer Settings dialog box.  After the browser resets, click Close and OK.  Close and reopen Internet Explorer to apply the changes.
Obviously it worked, because I am typing in this blog today.  Beware of Pins that lead to websites, not other blogs.  If you can't back out with one or two clicks, you've hit a bad site.  Today I am resetting my bar at higher security levels. I AM NOT GOING TO LET BUGS KEEP ME FROM PINNING.  Yeah, me!!!


Friday, January 27, 2012

Disney T-shirt

What does someone who thinks outside the box do with the cartoons she learned to make this week?  Why she puts them inside a box.

Next, she is going to tweek this box a little in order to print it onto transfer paper.  She will iron it onto matching t-shirts for the group.

There will be a caption at the top that reads, "If you see any of these characters at Disney World, they're with me."

Finally, she will nicely ask all of her friends and family going on the trip with her to wear her creation.

Wednesday, January 25, 2012

Cleaning Up the Cartoons


   Yesterday I gave you the steps in Photoshop to turn a picture into a cartoon.  As you can see, I have fun doing this.  Can you look at the pictures and tell where this group of ladies is going in February? 
   Today I went back into Photoshop and opened each of the jpegs.  Because the jpeg was in the NORMAL mode on the layers menu, I could use the paint brush all around it and on it to clean it up.  This is why it is soooooo important to make a copy of the original.
   When the original photo is converted through the filters, lots of extra black lines appear.  On the clean up, you can remove these by painting over with color.  You can NOT do this on the first round because it is in COLOR DODGE from the LAYERS drop down.
   Joan, has the silver Mickey on her shirt.  She is NOT cleaned up.  I left her this way as a comparison for you to see the difference. 
    I still like the cartoon my daughter made in Illustrator of me for this blog.  I'm still practicing.  I hope you try this someday.  No....you can't do this in  Word, but you can do it in mspaint if you have that.

Tuesday, January 24, 2012

Cartooning Photos


One of my New Year's goals was to learn to CARTOON.  I've updated this post a year later after my family LOVED being cartooned.  I did the above cartoon this summer, 2013 for my daughter's SHARK birthday party.

If you are REALLY interested, keep reading all the way down to the bottom.  The directions are below the blond in the pink shirt. The very last hint below the lady in green is my favorite thing I've learned.

 Below are two of the original before they were cleaned up to get the black removed.  Now I know that if you use the erase button in Photoshop, along with the shift key, you can create straight lines.  Small straight lines around a shape help let you outline shapes.


 Above is my husband's head on a clip art body.


                       I made paper dolls of my daughter's friends in bathing suits.  Then made them into a roulette board for last summer's beach party.  Since I had all of their heads, when they came for Easter, of course I just HAD (ha ha) to put them into Easter outfits.
 First I'll show you Aunt Lois, who just loved her big blue hat.  Then look below for the whole family.

  Of course, once I put the original one up on Facebook, I got lots of responses from everyone wanting me to either change their outfit or sending me an updated head shot to cartoon.  If you think it's easy finding clipart clothes, it's NOT.  I now have a picture file labelled Clothes.  Below is my son in his blue jeans and jacket.


                                     Above is my niece Erin in her "relaxed" outfit.


 I'm still using the head my interior designer daughter created for my blog.  I just love playing with paper dolls.

  The Patty's below were my first attempts.  If you are reading this post for the first time, see the link below for what I did with the cartooned friends when I went to Disney World with them.  Click on this link.   Disney Photo Transfer T-Shirt


     My daughter does this in Illustrator.  I only have Photoshop.  So I spent all morning trying to learn how to do this.  I copied directions.  I watched Youtube videos.  I got totally frustrated.  But...I am learning. 
    The hardest thing seemed to be getting rid of the background.  My other daughter, who uses Photoshop a lot, tried to teach me to mask and delete.  TOO HARD.  Lots of the directions said to use the "pen" tool and outline the character.  Try this before you follow the steps I ended up with.
       Remember--we are still practicing.

1.     Open a photo from your pictures file.

2.    Duplicate the layer.  (You don't want to play around with the original photo)

3.    Rename this new layer "Sketch"

4.    You want to CUTOUT THE BACKGROUND.  I used the polygon lasso tool (under the 
       dotted box) that looks like a mask. I used the magnifying glass to make the picture 
       larger.  I also dragged the canvas sides to make it larger. Then I  started clicking with
      the lasso tool in small segments around the photo of the person I wanted to cartoon.
      Once I reached the end of the loop, I double clicked to lock the loop.
5.   Then I turned the origninal background layer's eye off. 

6.  Then I went to top menu to SELECT and hit INVERSE.  That selects the
      background instead of the image you lassoed.  Then I just hit DELETE...and  
    Cntrl D to turn off the dots.  Make sure you make a DUPLICATE of this layer to
      work with.

4.  Go to the COLOR DODGE.  Under your layers drop down box on the side, curser
      down to find this.

5.  Hit Control I on your keyboard.  It will change the photo to white.  You almost 
     can't see it.  That's okay.

6.  Under FILTER on top bar menu, go to BLUR--then Gaussian blur. (Very important).  This turns the photo bluish.  Change the bar on this screen to 7.0

7.  Go to LAYER on top menu bar.  Choose NEW ADJUSTMENT.  Choose 
    THRESHOLD.  Hit OKAY.  Another pop up box appears.  Change numbers
      in it to 234.

8.  Go back to top menu bar.  Go to LAYER--NEW--MODE--Multiple.
     (The multiple lets you color over the black lines, like a water color.

9.  Go to your PAINT BRUSH tool.  Choose colors to fill in the outlines.  Use the
     magnifying glass to enlarge the cartoon, so that it's easier to fill in. 

Now...if you practice this and it works, play around and see how good you can get. 
Save the result as BOTH a jpeg AND a photoshop extension.  You can go over and repair the photo while it is a jpeg by recoloring.  See next blog for instructions.
I have since learned that in Photoshop, you can hit the shift key along with the eraser toolor drawing tool to stay in a straight line.  Click on the tool, put the cursor where you want to start erasing, then hit the shift key.  Keep it held down while you move the mouse along the edge of the clipart.  I LOVE this hint.