Showing posts with label Fun Foam Characters. Show all posts

Monday, July 7, 2014

Patriotic Party at the Beach


My family all gathered at Bethany Beach for the week of the Fourth of July.  Since there would be a dozen of us on the holiday, buying patriotic hats for everyone would have cost too much money.  Having made hats with first graders for so many years, I took my fun foam skills and applied them to this holiday.  We started with long strips for the headbands.  I cut the large 11" x 17" strips into thirds (the long way).  Then I cut one of those strips into thirds (the fat way).  Then I glued the smaller strip onto the longer strip to make a headband long enough for an adult's head.  I brought my stapler and tacky glue with me on the trip.  This took the intimidation factor away from everyone.  We just helped measure each others' bands around their heads and stapled them for the correct fit.
Here is one of my "adopted" kids.  My daughter's friends have become so close to our family, that one by one they've become an integral party of our family.  Trevor married into the family and is now the father of my "adopted" grandson.  He is wearing my original hat pattern.  I cut the white foam strip in the same manner as the red band, gluing on the extra strip for head circumference.  I simply then folded the longer extended white foam piece in half (the long way) and cut into the fold to make a lantern.  Once I had opened it and refolded it the opposite way,  and glued and stapled it into the red band. I then folded the top half of the lantern down into the red band to make the loops.
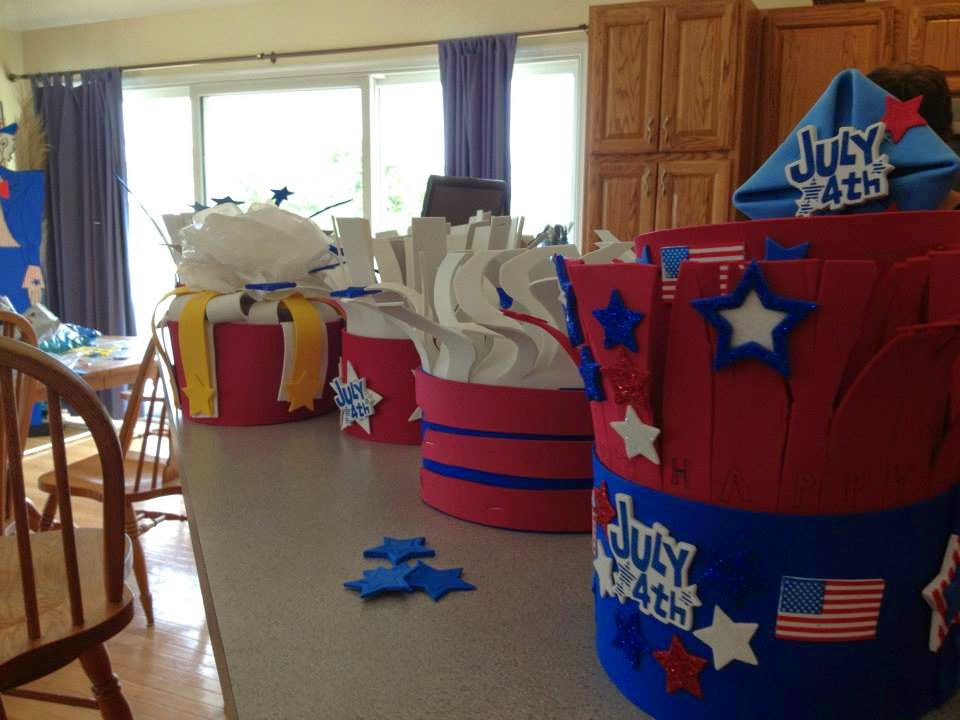
I didn't have enough white fun foam to do this for everyone.  I bought out all the red, white, and blue sheets our Michael's sold, but Uncle Sam took a LOT of foam.  So, I folded the white sheets (the long way) and cut them in HALF this time.  I again folded one of the white strips into THIRDS for the extensions and glued them onto the longer strips.  The family could cut these strips in any manner they liked. They just had to leave a 3" wide edge that had glue on it.  This edge was glued into the top half of the red band.  I took a small glass and added water to the tacky glue in it--so that they could "paint" the glue onto the foam.  

If you look at the second hat from the right, that is Trevor's WAVE pattern.  His wife Rachel took a pen and curled her white strips, while my niece Valerie cut her strips into thin grass-like strips.  She and her fiance, Steve dropped by for the afternoon for the festivities.  They left to have dinner with their friends in Ocean city. I double-dog-dared them to wear the hats out to dinner.  See below.

Val texted me this photo with the message that everyone in the restaurant was taking pictures of them and wanted to know where they got the hats.

I bought glittery stars, flags, Fourth of July  foam stickers at Michael's.  I also pre-cut lots of fun foam stars.

We had a hat contest and asked people walking on the beach past us to judge.My daughter Maryanne was the winner. 

My husband, Buzz, the architect, only came in second.  He was sure his multi-tiered hat would win with it's hand cut "Happy Fourth" sign on the front.  My daughter Annie's hat had stars on strips.  She's an interior designer and thought she had a shoe-in win.  What she did do was cause a one-up-manship for the rest of the crowd.


                                              Even the baby wore a hat.
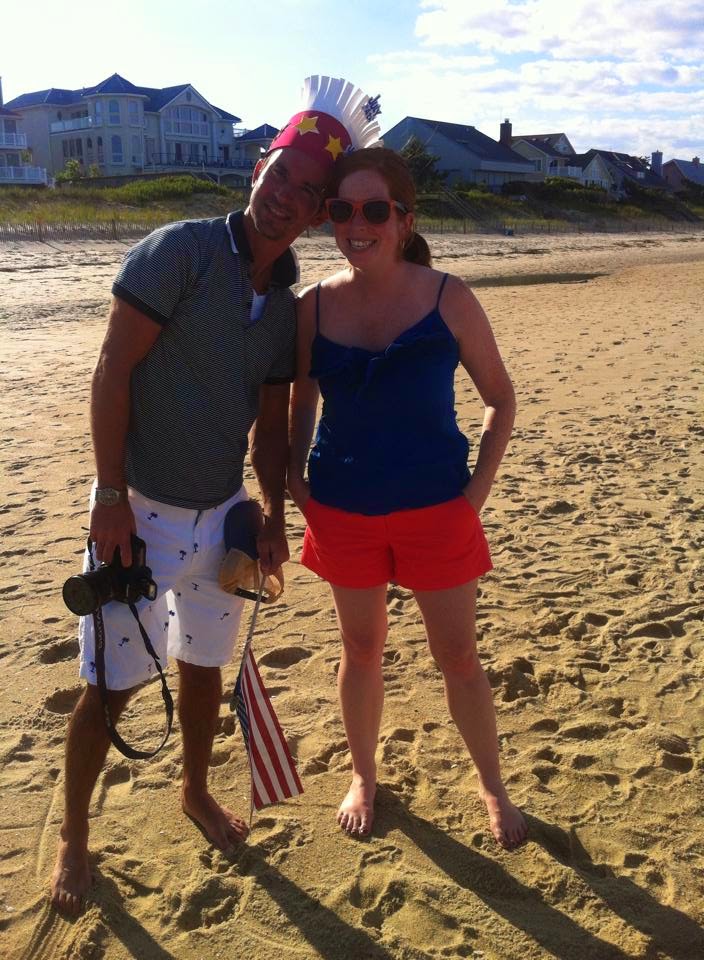
            Are you too cool to wear a hat?  Even my son got into the spirit.


I thought my Uncle Sam was so tall, but my future nephew Steve is even taller.  Because Sam is made with insulation and fun foam, he is waterproof.  We took the shark I made last summer right into the ocean.  

  If you want to see how I made Uncle Sam and missed the post, go to  Uncle Sam HERE

I hope all of you had as much fun on the Fourth of July as we did.  The hurricane blew through, but we didn't let it bother us.  I saw a sign in one of the shops over there that said, "DON'T WORRY ABOUT THE FORECAST.  LEARN TO DANCE IN THE RAIN."

--Jani


Thursday, August 1, 2013

Shark Birthday Party


I saw this shark head, believe it or not, on Pinterest from a Martha Stewart designed Shark Wedding.  I started searching on the internet, but couldn't find it ANYWHERE.
I went to VA Beach with my girlfriends for a few days.  We went to Forbes Candies to look for souvenirs, and there it sat on the shelf.  Since I will be throwing a "Don't Let Turning 31 Take A Bite Out of You" shark party for my daughter at the beach, it seemed the perfect time to use it.  Of course, since it's SHARK WEEK and we were playing Mahjong  in VA Beach, I had to put it on the serving table.  The ladies loved it.  After the beach, it's going to the office Margarita party to hold shrimp cocktail sauce in the shrimp serving dish.  ( I looked on the box for a manufacturer for you, but there wasn't one.)


I am updating this with the insulation foam shark I finished last night.  This was the left over piece from the Uncle Sam I built for the Fourth of July.  When I blew the shark jpeg up in Print Master, I used 4 x 4 sheets (20 pages) to make him 42" long.  I used the burning wand I bought to make Uncle Sam....only this time....I didn't stand on my porch saying, "I'm melting.  I'm melting."  I painted the sides and back flat black, then used the pattern I'd enlarged to make him.  See the darker blue and gray.  I used Sharpie Paint Pens with water to make the striations.  I am going to put him on a long dowel so that he can go to the beach AND INTO THE OCEAN.
 I found this little guy on Amazon.com after typing in RESIN SHARK HEAD ORNAMENT FOR AN AQUARIUM.  It was only $9.  It might be too small.  He's pretty much useless unless I am putting him in a small platter of shrimp.    Update:  I found the large plastic shark head from www.agiftcorp.com  at a Forbes Candies in Virginia Beach for $24.  


                 Below is one of the shark fun foam photo op masks I am making.


 Since Bethany Beach, Delaware is close enough for her friends to come over for the weekend (some stay all week with the family), beach themed parties are fun.
Last year's theme was a sailor theme, because she was saluting her twenties goodbye.    Anyway.... her friends like to take lots of photos...and play games.  So, I am making up some shark fun foam props.  You peek through the shark's mouth.  I have also make up a pattern in blue, but I haven't glued it together so that I can trace it onto the foam.
I haven't decided whether to keep it two-toned or just one color.  Below is a picture of the two most used items at the beach.  I found the first one, the orange lidded jar and straw at Costco and Target.  I bought as many different colors as I could find.  Every day, the family and friends grabbed one and filled it with their beverage of choice and took it down to the beach.  I bought the handled buckets to bring lunches down to the ocean.  One day, though, we floated one in the baby pool the house had and tossed the squirt sharks below into it for a game.  Everyone liked that.  We were chased from the beach a couple of days due to vicious biting flies.  A neighbor told us they came 5 times a year with a westerly wind.  So the game came in handy.


I ordered two dozen of these on Amazon.com to play "shark pong" on the deck of the beach house.  It's played like beer pong, but with sharks.  I'll bet you figured that out.  I bought these fabulous plastic handled  mason mugs.  We can use those as targets.

I am also building one of my insulation foam sharks with my new burning tool.  I made a sample with the fun foam glued onto it.  Then I soaked it thoroughly with the hose on my deck.  I wanted to see if it was semi waterproof.  I'm thinking since it's big, it might end up in the ocean for some photo ops.  If you'd like to see last year's beach prop, go see Sailor Boy Prop here.


The birthday girl is in the middle.  They loved the shark hats.
Shark Placemat I Made

If you want to make a shark cake, look me up as FunJani on Pinterest and go to my shark board.  I am making the cake with two round pans. Update, make sure to have confectionery sugar on hand for egg white frosting.  I used a can.  The family thought it was hysterical and looked like a muppet, but I was disappointed.

So...the next day I put the left over pieces in my large cake pan, frosting and all.  I spread a half gallon of vanilla ice cream on top, then added a meringue topping.  I baked it at 425 degrees for ten minutes.  The kids all watched in amazement as the ice cream did not melt.  This was a big hit.  Below are two pictures to prove that the insulation shark really was waterproof. 


Tuesday, July 2, 2013

Uncle Sam Party Prop

 
Uncle Sam doesn't care if it is raining in Virginia


 I couldn't find an Uncle Sam I really liked.  So I took apart three of my favorite cliparts and combined them to make the image I am working with.  If this is the first time you are seeing one of my fun foam characters, go to the label Fun Foam Characters and see how they are made.


I start by inserting a clip art image into my Photo Shop program.  This program lets me size the clip art any size I want by printing the image out in many pages which I glue together.  Since he was narrow, I enlarged him to 5 x 5 pages.  This gave the result of a lot of blank pages, but a 50 1/2 " character that is 22" wide.  

Each column is five sheets of paper.  I took this picture to show you how big the pattern starts.  


Then I get out my 11" x 18" of fun foam to see how to cut up the image to fit on each sheet.  As you can see from his shirt and vest, I have already cut off his shoes, pants, and head.

I was lucky.  His pants fit on one piece of white fun foam.  I needed to strip them with red paint sharpies.  So to copy the stripes, or any details, I used the point of a pencil.
I just follow along any lines I want to copy and punch holes right into the fun foam.  The sharpies cover up the holes and they are barely noticeable.


Yes, I decapitated him.  But I had to trace his head onto fun foam.  After I traced his head, I cut off his beard, mustache, and hair to trace separately on white fun foam.
I pencil pricked his features.  I found that I can use white out for pupils.  It dries nicely on top of black sharpie.  If you look to the left of this photo, you can see that I am tracing his hat in three different pieces.
Here are all of the fun foam pieces placed together on my dining room table.
My son the architect gave my a new idea.  I was depending on my hubby to help me use xacto knives to cut the foam core his office uses for mounting designed and photos of projects.  It is expensive board, but dense and hard to cut.  I tried using science display boards, but they tended to be flimsy.  He suggested I use  1/2" wall insulation from Home Depot.  He bought me an insulation burner at Michael's.  It looks like a magic wand.  You plug it in; it heats up; and you get to burn the pattern.  I was afraid of a new tool at first.  I traced the pattern onto the insulation and started "melting."  I kept saying, "I'm melting...I'm melting."  I thought it was funny, but my kids didn't.  

Uncle Sam "burned" in insulation foam.

I tried spray painting the back.  I went back to Home Depot and bought black paint. I painted his edges and his back with a small roller and brush.
(Aren't my pooches cute?)

He's drying right now.  In the kitchen.  Because it's raining outside.  It's been raining all week here in Virginia.  If he gets wet, that is okay.  I took a sample piece I had cut off (burned off) and soaked it with the hose.  I am using the rest of this 8' x 24" foot insulation to make a shark for my daughter Annie's beach trip in September.  Now I know we can have photo ops with the shark in the ocean.  Key in Jaws music here.

I got tired of hauling around pots filled with cement to parties.  I found something nifty in the pvc plumbing section.  I haven't made it yet.  I hope it holds Uncle Sam up straight at for the party.  I will update this post with the finished product and stand.


Tuesday, February 26, 2013

Olivia the Pig Baby Shower

Here is the fun foam 4 foot Olivia.  She was fairly easy to make from an enlarged pattern.  

See how I made Winnie the Pooh fun foam characters here.

Alice in Wonderland Party tells how to enlarge clipart

Fun Foam Margarita Man

I am helping to plan an Olivia the Pig baby shower.  Since it is a "Sip and See" tea party, I wanted to use lots of silver.  I have these silver frames I bought on sale at an outlet.  They have been to two weddings and two parties to date.  I had worked on putting Olivia in different outfits, but hadn't decided on how to display her.  I matched up nine of her "Life Lessons" and framed them.  

In the first four frames, the lessons are:
  • If you are cow #2, having a moon to jump over is always good.
  • Sometimes you just have to use your big voice.
  • It's important to use fancy french words when you're talking about ballet.
  • Whatever the question, costumes are always a good answer.

In the next five frames, the lessons are:
  • Every day is a good day to play dress up.
  • Not everyone looks good in red, especially when you're pink.
  • If you have to sit next to a brother eating spaghetti, you'd better wear a raincoat.
  • Be nice to your toys and stuffed animals, because one day they may end up helping your best friend.
  • When you're at a party, it's okay to pig out.

I am using the characters on tags for the milk bottle favors.  I have made a big fun foam Olivia as a decoration.  I have a couple of her books for the buffet table to go along with the cake. 

Here is my BFF's mom holding the new 10 day old baby, LeeAnn.  They dressed her in Olivia's colors.  We all got to hold her as she slept through the whole party.
 
 These are the two proud grandma's.

 I LOVE my spiget jar.  I have an added little table it sits on to give it the extra height to get the jars under the spiget.  The bottles were punch glasses and favors combined.  I bought the Starbuck's Frapaccino bottles and peeled off the labels.  Then I sprayed them with GlueGone and washed them in hot soapy water.  Amazon.com sells the acrylic straws. I put an Olivia in a dozen different outfits on each tag.
Here is Olivia blown up in PrintMaster to a 2 x2 sheet size.  She is reversed on the other side.  I just glued her together and slipped her onto the wooden blocks with dowels I made for the Christmas party.  She was in this costume on one of the drink tags also.


Here she is in some of her outfits.


 I am going to attempt to use Wilton's 3-D bear pan to make an Olivia cake.  I will post a photo if it turns out.  I didn't want to use a lot of red fondant, so I am putting her in the cow costume.  I have a large stuffed Olivia to give to the baby with an outfit with tights.  As Olivia says, "Sometimes your lucky tights are luckier than you thought." 

The above photo is of the crumb cake layer of the Olivia the Pig cake I am making. I baked a chocolate cake in the 3-D pan.  I made up two cake mixes.  I added chocolate instant pudding from the box and an extra egg plus on 1/3 cup oil to make it thicker.  The pan takes 1and 1/2 cake mixes.  I baked the other half of the cake mix in a meat loaf pan for the legs.  I use canned frosting for the first layer.  You must refrigerate this until it sets. I leave it overnight in the frig.  As you can see, I cut the bears ears off.  I also trimmed down his original legs which stuck out to the side.  The legs aren't as big as they appear in the photo.  It is the angle I used. 

 I wanted the new tall ears to stick up, so I printed them out front to back and glued the four pieces together.  This gave me a thicker ear, but not as thick as cardboard.  I rolled out pink fondant,which I made from white tinted with pink and a little orange for the ears.  I ran it through my pasta maker for thinness.  I used my cardstock ears as patterns for the fondant.  Then I frosted the cardstock ears with canned frosting and attached the fondant ears to the front and back.  They are drying.  Tomorrow I will paint the inside with diluted food color.  Tomorrow I will cover him with egg white frosting.  I will pre-cut black fondant cow spots.  Olivia will be dressed as a cow for this cake. (She was a cow in a school play and very upset that she didn't have a speaking part.) I'll build up her nose with extra cake I trimmed from the bear.  I hope it turns out cute, don't you?
Here is the Olivia cake.  Just kidding.  I found this picture on Pinterest and DREAMED about being able to make it.  Below is the disappointment, to me, not my friends, of my cake.
The ears were too big and heavy.  They split the bear's head in two.  Then I had to do major repair.  I stuck a dowel in until I got to the party.  The pink was the wrong color.  It should have been more orange.  Olivia's Life Lesson # 8 When you add liquid food coloring to your egg white frosting, it will not stiffen quickly.  It will slide, and slide, and slide. The fondant cow spots came out nicely.  Her legs were too wide. But...she was delicious. The hostess yelled, "We're going to cut the pig."  Everyone came to see the fun.  The oreo pudding I added to the mix gave it just the added edge.  The too wide legs were good sizes for eating.  I will give this more thought if I ever have to do another pig.  I am not making the Easter Bunny from this mold now.  I saw a pinata cake with unwrapped candy pieces inside it.  Check out my FunJani pinterest board on Cakes and Cookies.  I AM doing that.


Monday, August 6, 2012

Photos of Ballerina Monkey Shower


It's always fun to start off with a photo of the table.  The monkey ballerina on the motorcycle was a hit.  As was the box of cupcake onsies.  I even found pink monkey napkins on amazon.com.  The party started at 7pm.  We were afraid some of the guests might have skipped dinner, so we served chicken salad sandwiches and cheese and crackers along with the desserts.

Since the mom-to-be couldn't come across country for the shower, we put her picture on the mantle above the ballerina monkey banner.  We wrapped her gifts at the party and packed them in a HUGE box to be shipped to California.


I can't believe we actually got the centerpiece in a large gift bag, along with all of these surprises.  She has NO IDEA we did this.


I saw the cookie pizza idea on Pinterest.  I had the serving tier, so we went for it.  I had given my bff a baby foot pattern to cut the cookies.  Don't try using a cutter with store bought dough from a tube.  It spreads.  But, these were a big hit.


Here is the fun foam monkey ballerina welcoming everyone from her corner.


Here she is with the balloons attached. (My camera phone didn't do well here, but she is posted on a previous post). Directly above is her pattern on my table.


For the first game, each guest was given a shoe pattern.  They were to cut it out, write a message on the bottom, then glue it together with no directions. (Previous post has the pattern).


Patty, grandmother-to-be, and her daughter-in-law Alicia were the last to complete the shoe.  Two hours later (just kidding) they were laughing because they refused to give up.

Here are two guests working hard on the second game.  I will put this on the Monkey Ballerina post.  I researched "baby talk."  I found out it is actually good for the baby because it encourages them to speak.  But...finding 27 words to fill up three baby bottles took time.  I gave them the English words in the left bottles.  They had to write the baby talk words in the matching right bottles.  They loved this.

 Here are two more guests working hard.


 We dipped strawberries in pink chocolate.  We made flowered tartlets with pink lemonade filling.  We served the chunkie monkey cookie cups with chunkie monkey ice cream.  Mmmmm....


 Here is another member of the ballet class in her tutu in the wagon with the Cookies in a Jar prizes.  The recipe is on the tags.  I also made smaller favors in shaker jars with a home-made meat rub.  I didn't know how these would go over, but the guests LOVED the idea.


Please see the silver stacking cups in holder that I purchased on whim at Luckett's Antique Store.  I fell in love with them instantly.  The love continues after using them at the shower.  The kept the pink lemonade punch ice COLD for a very long time.  I can't use them for hot drinks, because they made the metal too hot to handle.  I could make cozies for them, but that's another post.


 Above is a close up of the onsie cupcakes. I found the how-to on Pinterest.  See Baby Shower Board.  I reused one of the quilt table runners from Erin's wedding.  I added pink gingham ruffles to each end.  

             Sara, when you see this post, we want you to know that we missed you at your East Coast Baby Shower.  We can't wait to see pictures of the baby when she comes. We wish you the very best in your new exciting life as a parent.